How to add LED strips to your Tiny Whoop
I’m definitely not an expert, so please take this with a grain of salt. This article is primarily a way to document my own FPV journey; consider it a personal roadmap first and a tutorial second.
Why should you install LEDs on your quad?
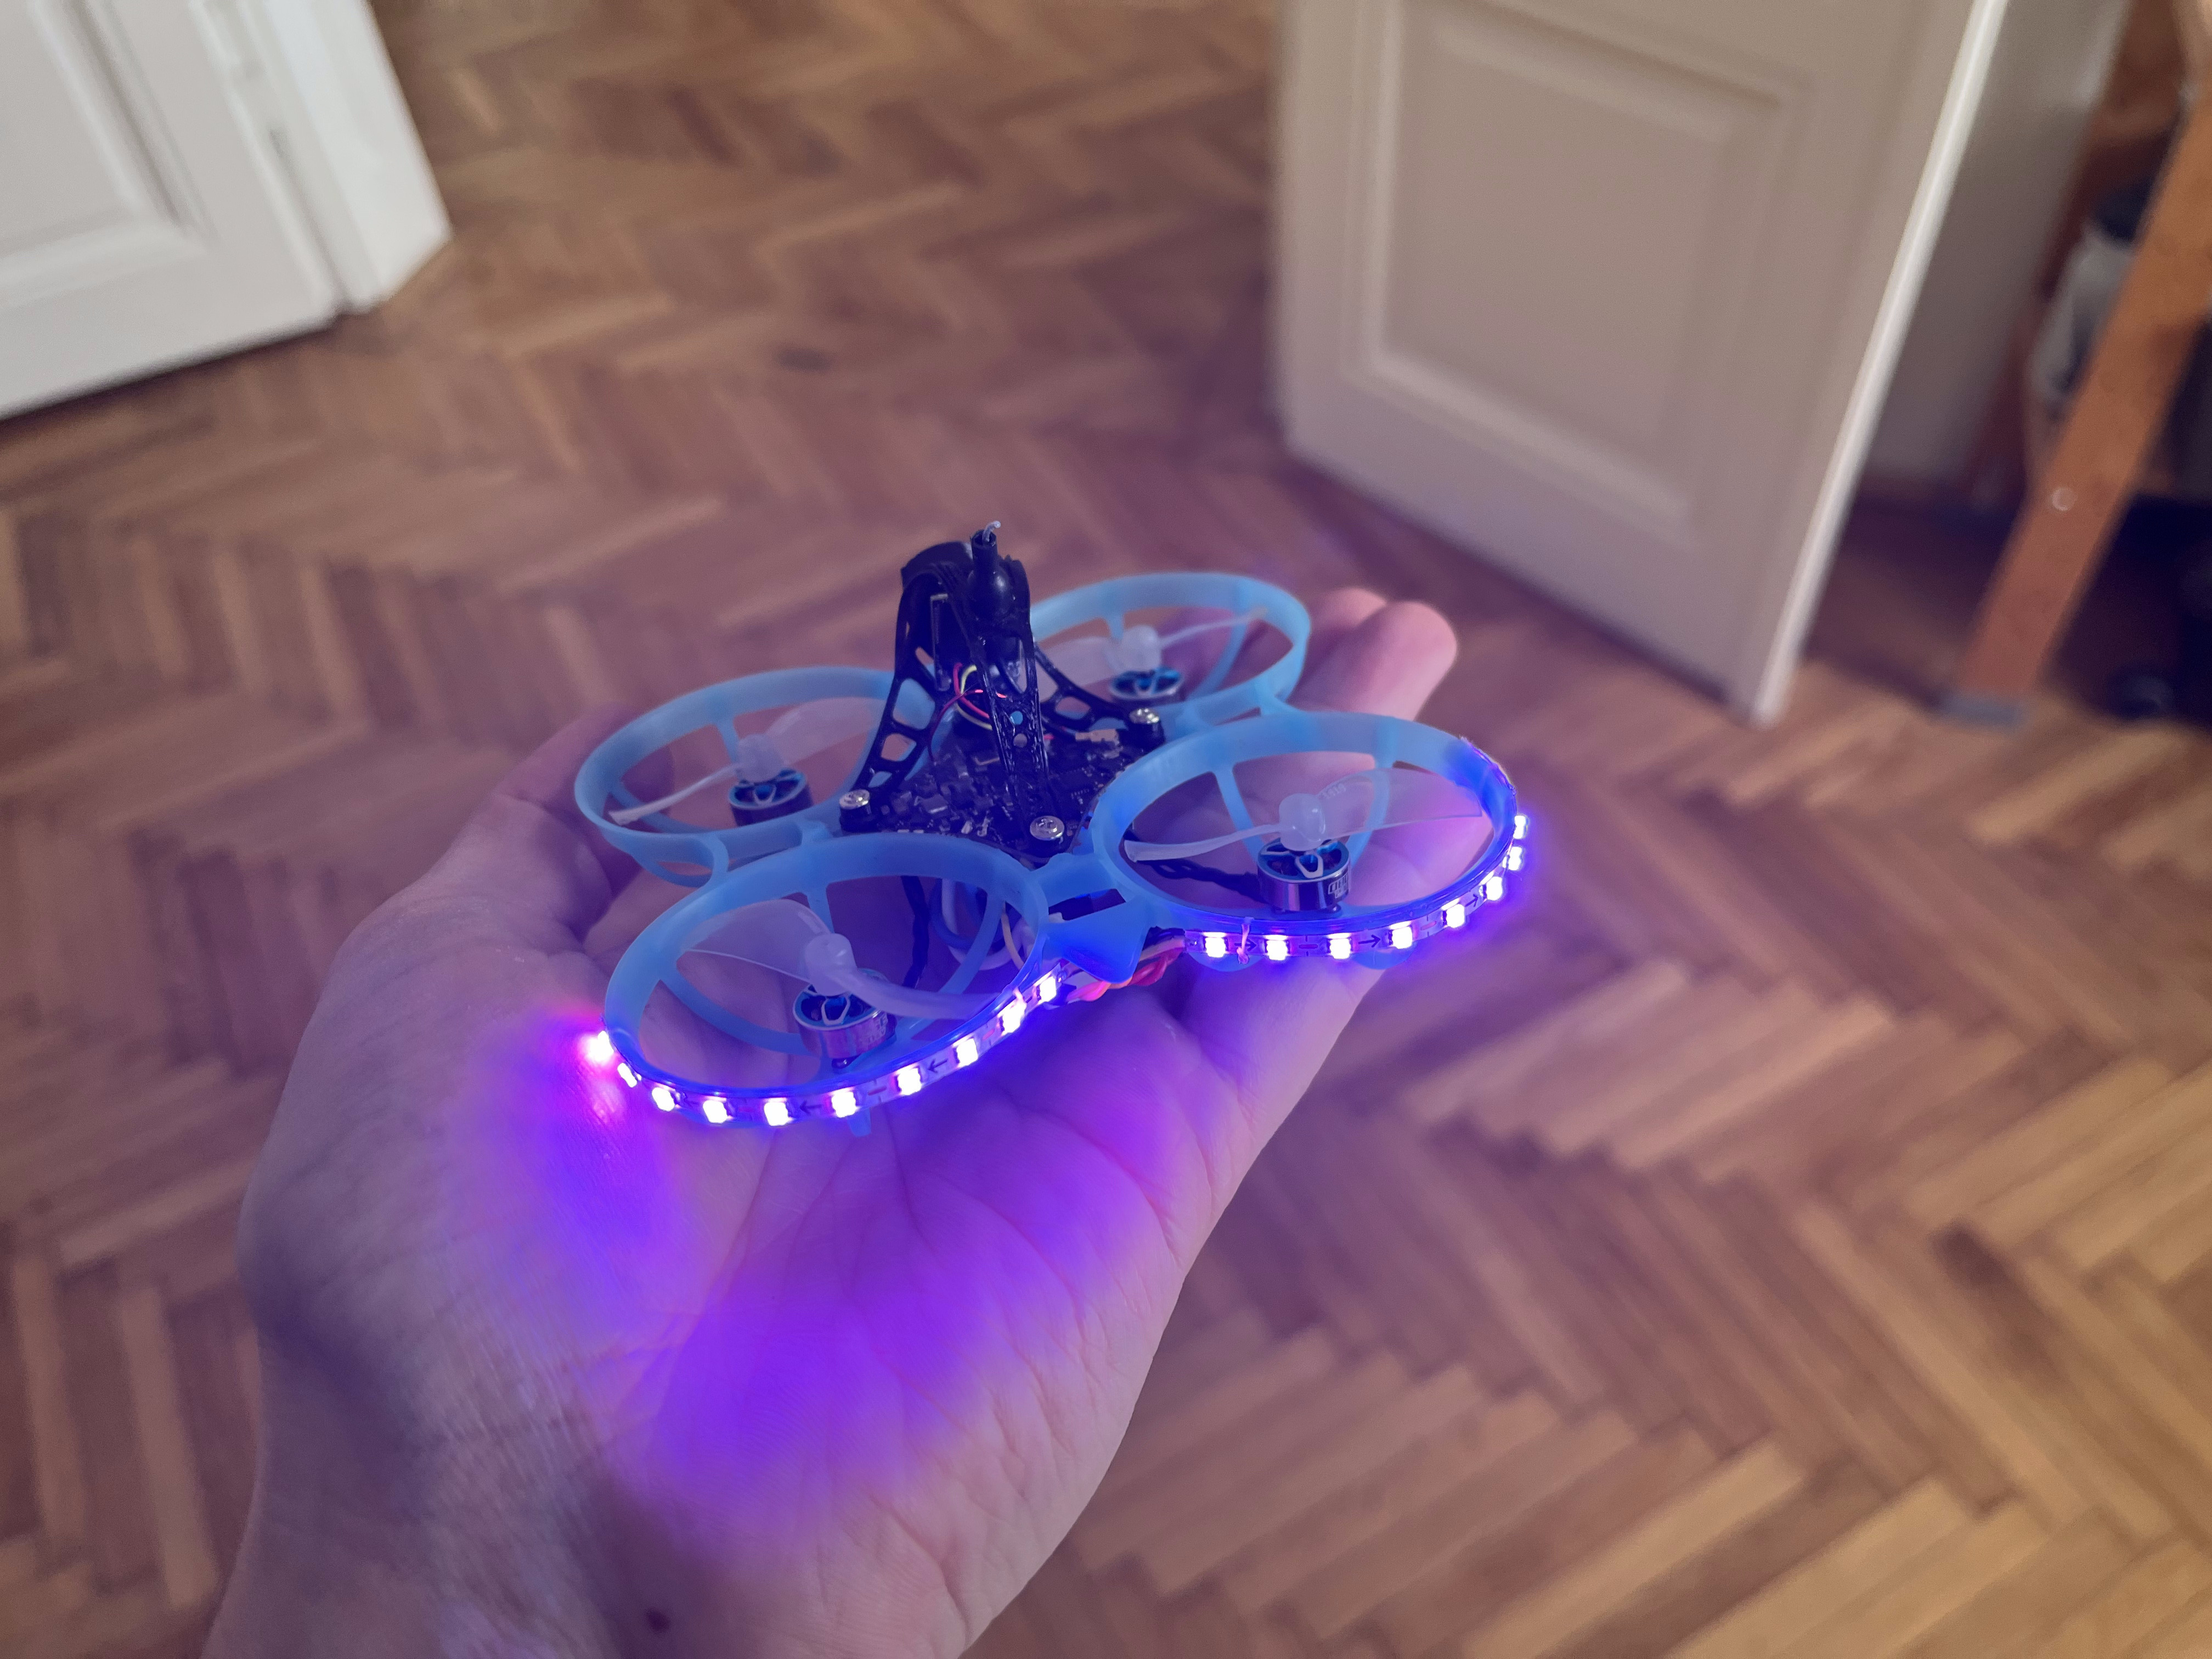
Let’s face it: LEDs just make your quadcopter look cooler. Some FPV drone races even require them, both to make it more interesting for viewers to follow along as well as to make your quad easier for other pilots to see in order to avoid crashing.
Components
I bought some WS2812B 2.7mm flexible RGB LED strips from aliexpress. These can be programmed to show a range of colors. Make sure you buy the 5V version, as that is what the AIO provides. Additionally, I also got some thin silicon coated wire to mount it all together.
Installation
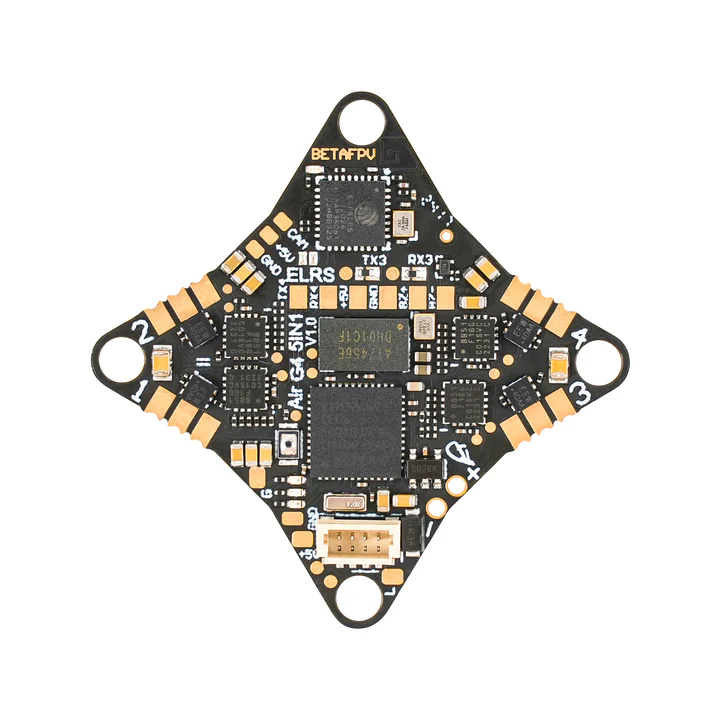
On the bottom of the flight controller, towards the back, there are 3 pads that are important for this project: the 5V, GND and the RGB LED pad, labeled with an ‘L’. These need to be connected with the corresponding pads on the LED strip. This can be quite tricky, as the pads on the LED strip is really quite small.
I used some dental floss to mount the LED strips on the frame. This might sound a bit strange, but I have found it works well and holds up during crashes where hot glue or superglue would crack.

Configuration in Betaflight
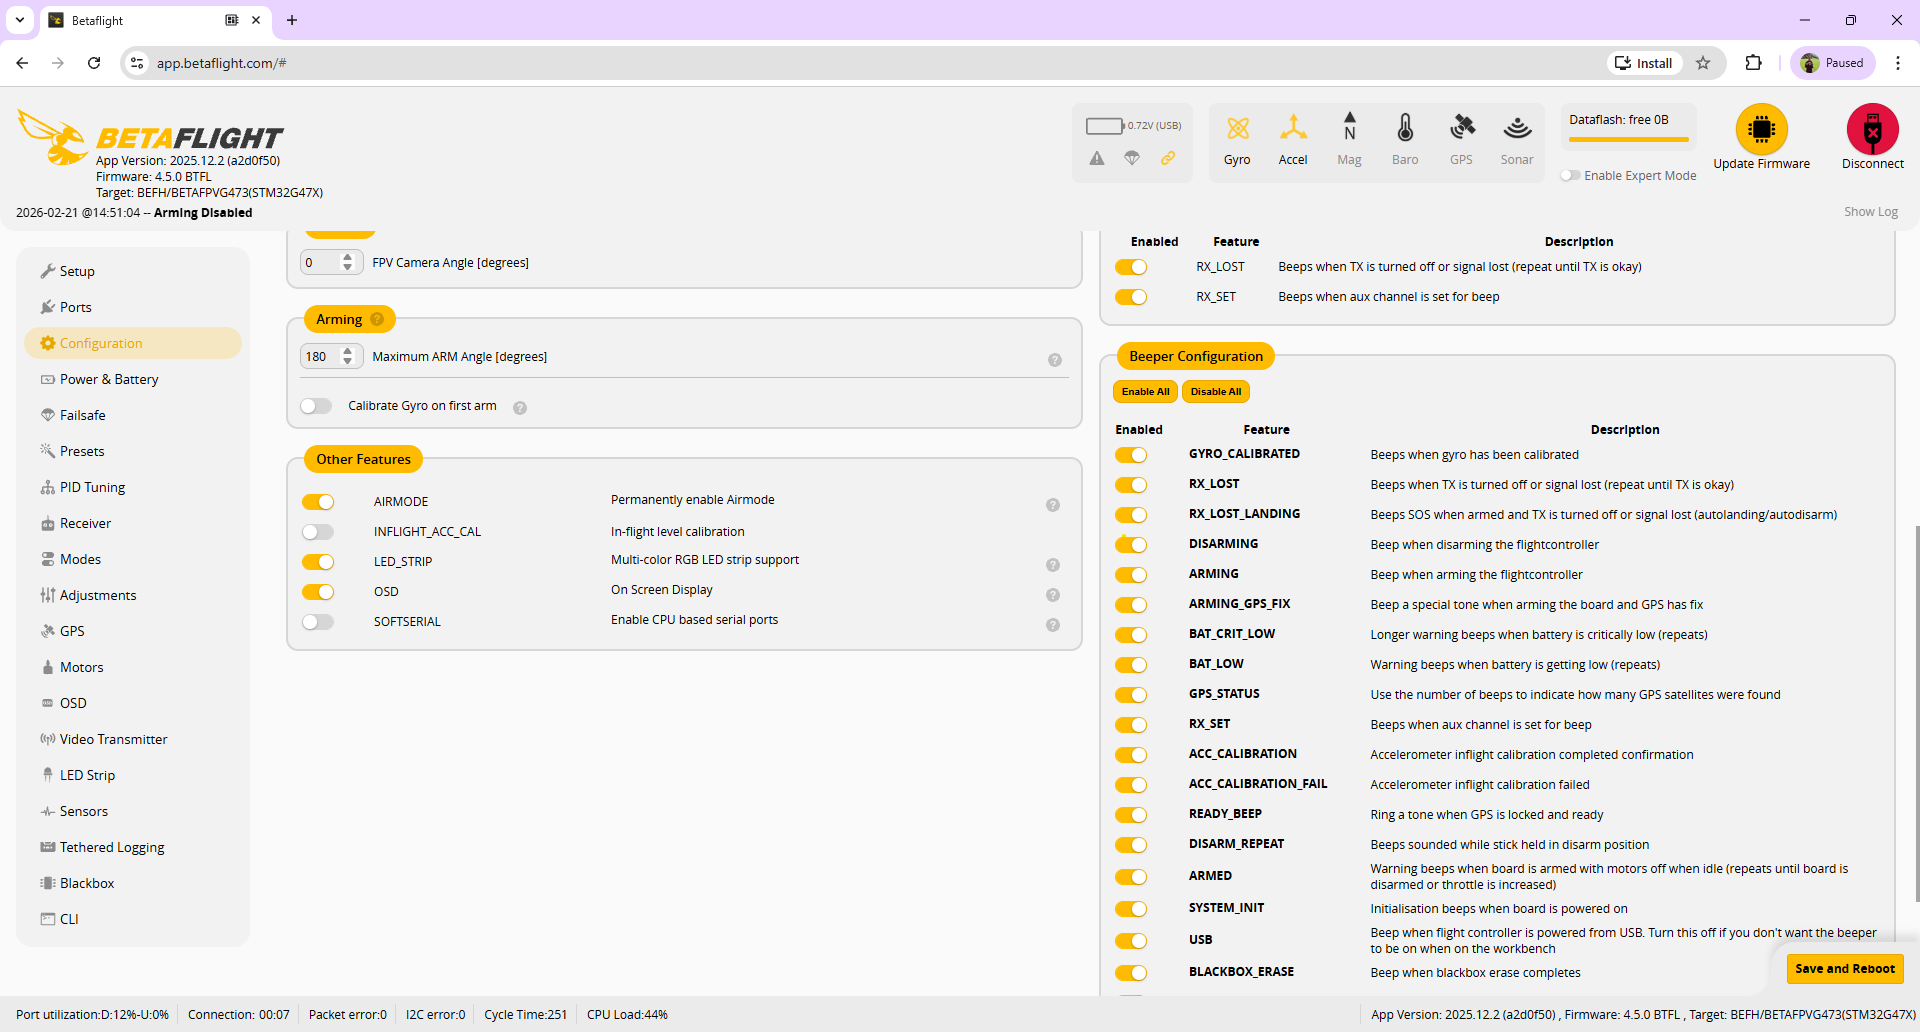
To actually make the LEDs light up we need to enable them in Betaflight. To do this, connect your quad to your PC and go to betaflight configurator. In the Configuration page, enable the LED_STRIP option.
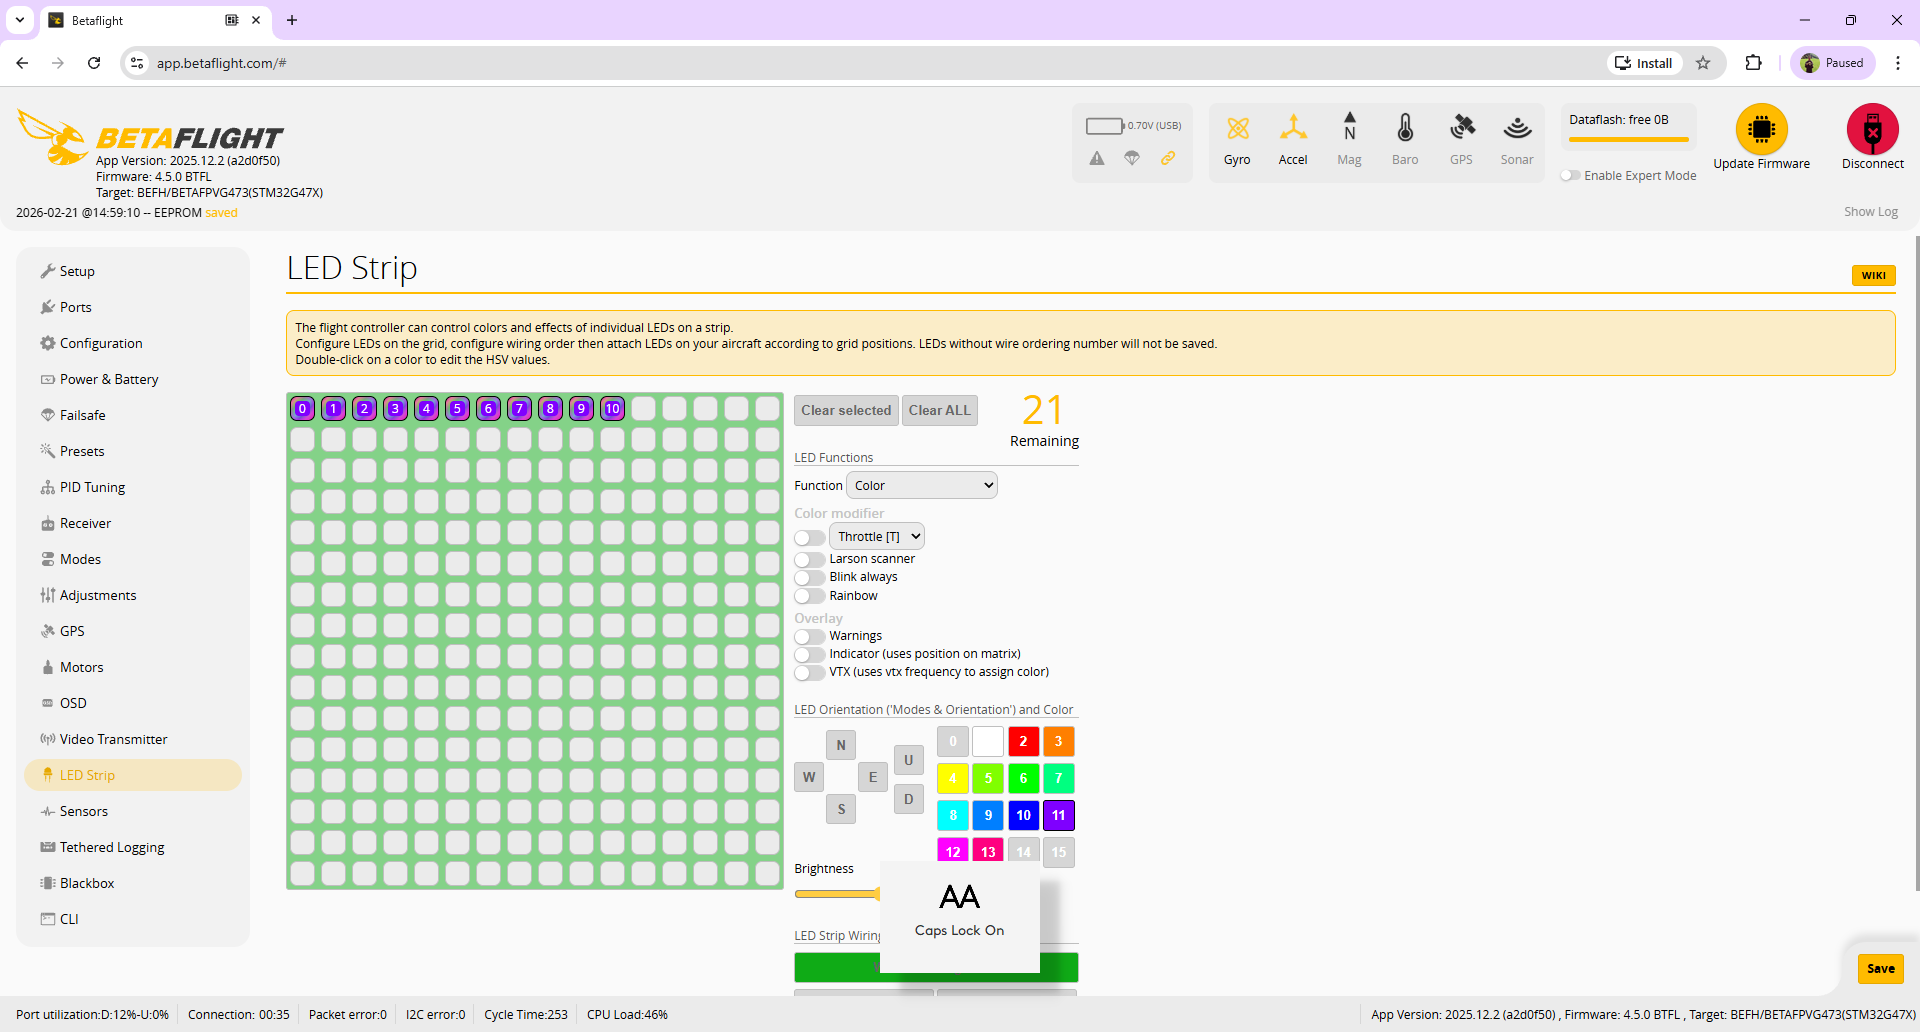
Next, go to the LED Strip page and select the number of LEDs on your strip and choose a color. It is also important to select Function: Color, otherwise the LEDs will not light up. It is also possible to map the LED to a channel on your reciver, so you can turn the lights on or off on the push on a button. To do this, simply go to the Modes page and select an AUX channel for the row labeled LEDLOW.
That’s it!