How to fix 'RX Loss' on the BetaFPV Air65
I’m definitely not an expert, so please take this with a grain of salt. This article is primarily a way to document my own FPV journey; consider it a personal roadmap first and a tutorial second.
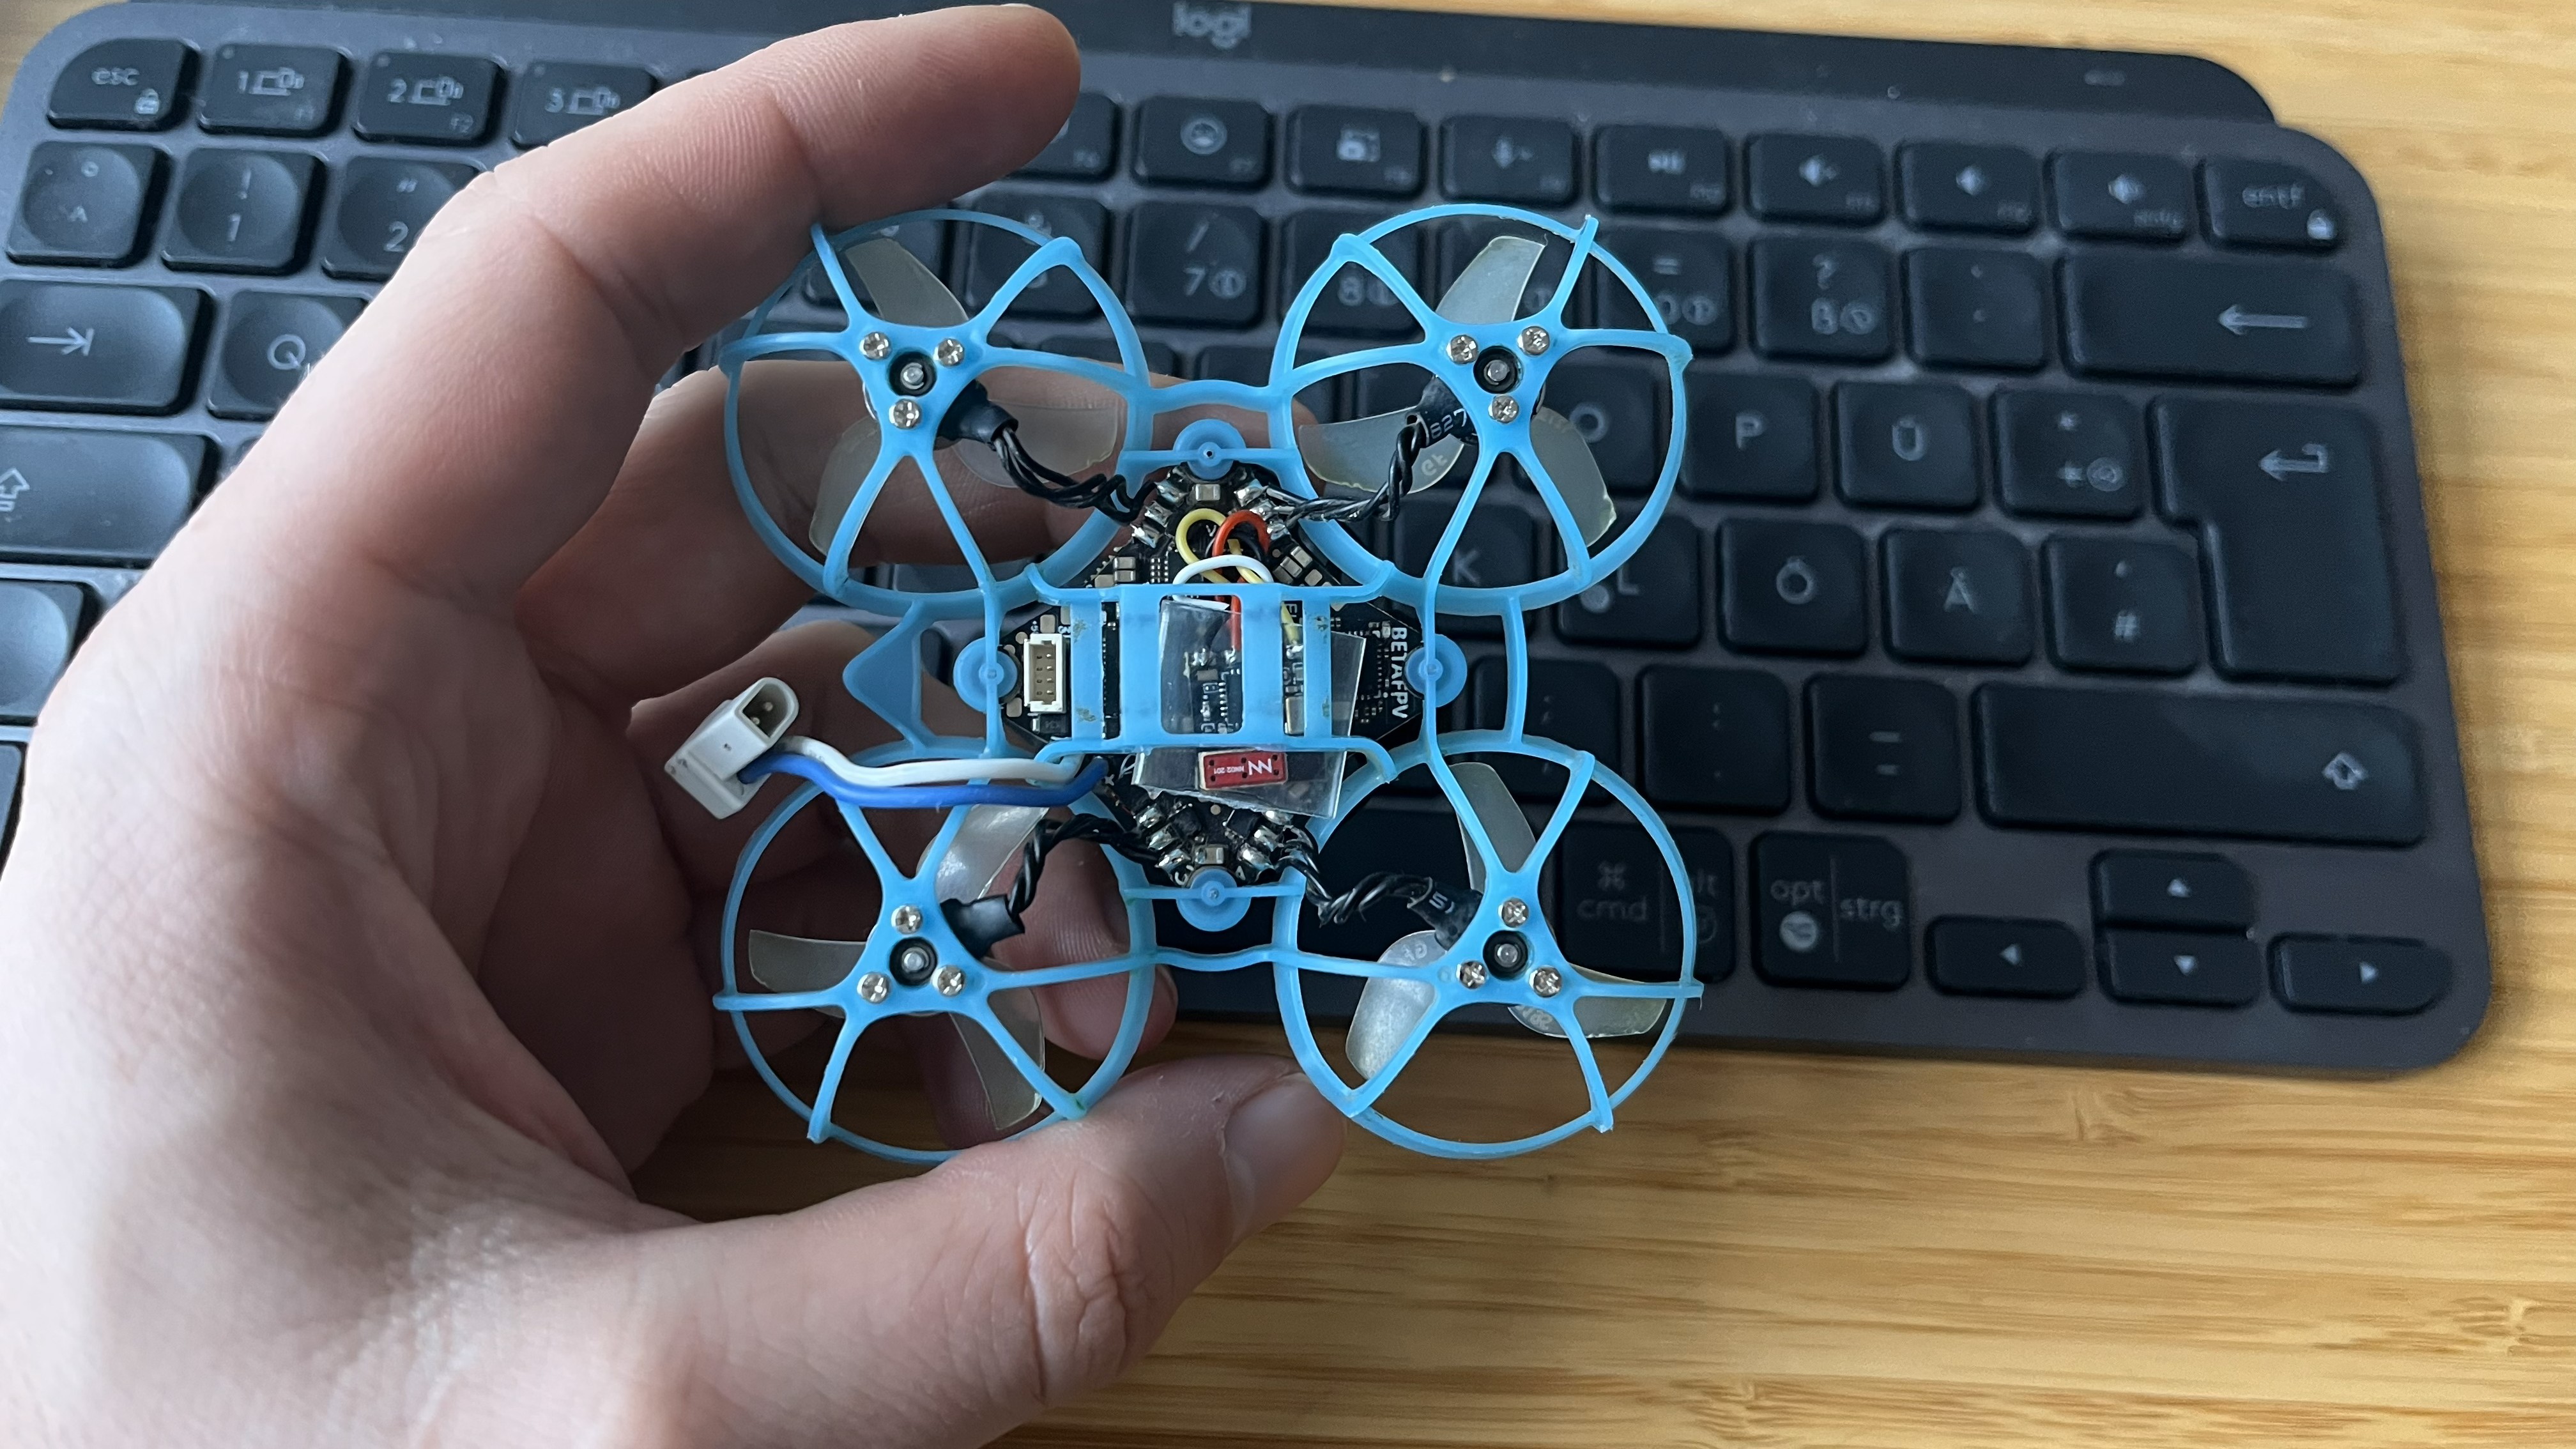
The BetaFPV Air65 is a remarkable little FPV drone, agile and powerful all while being very affordable. It was my first FPV drone and it’s what got me into the hobby. Unfortunately, it also has some flaws: it’s quite well known that the Air 5in1 flight controller (FC) is quite fragile. Especially the VTX (Video Transmitter) and the ELRS (control signal receiver) chip are prone to breaking. And when after some crashes I started getting ‘Telemetry Lost’ and ‘RX Loss’ errors, I knew what was wrong - the ELRS receiver.
Fortunately, replacement ELRS receivers like the BetaFPV ELRS Lite are quite cheap (~10$), and can be installed relatively easy, even by soldering beginners like me.
Before starting, it is important to make sure to have the correct tools: I have a TS101 soldering iron, some 63/37 soldering wire (3mm) and a kester flux pen. The soldering iron is great, it’s very small, compact and can even be powered from a lipo or powerbank. And after meeting some other pilots it looks to me like pretty much the standard among FPV pilots. Some helping hands or a bit of thumb tack can also come in handy to hold the parts in place.
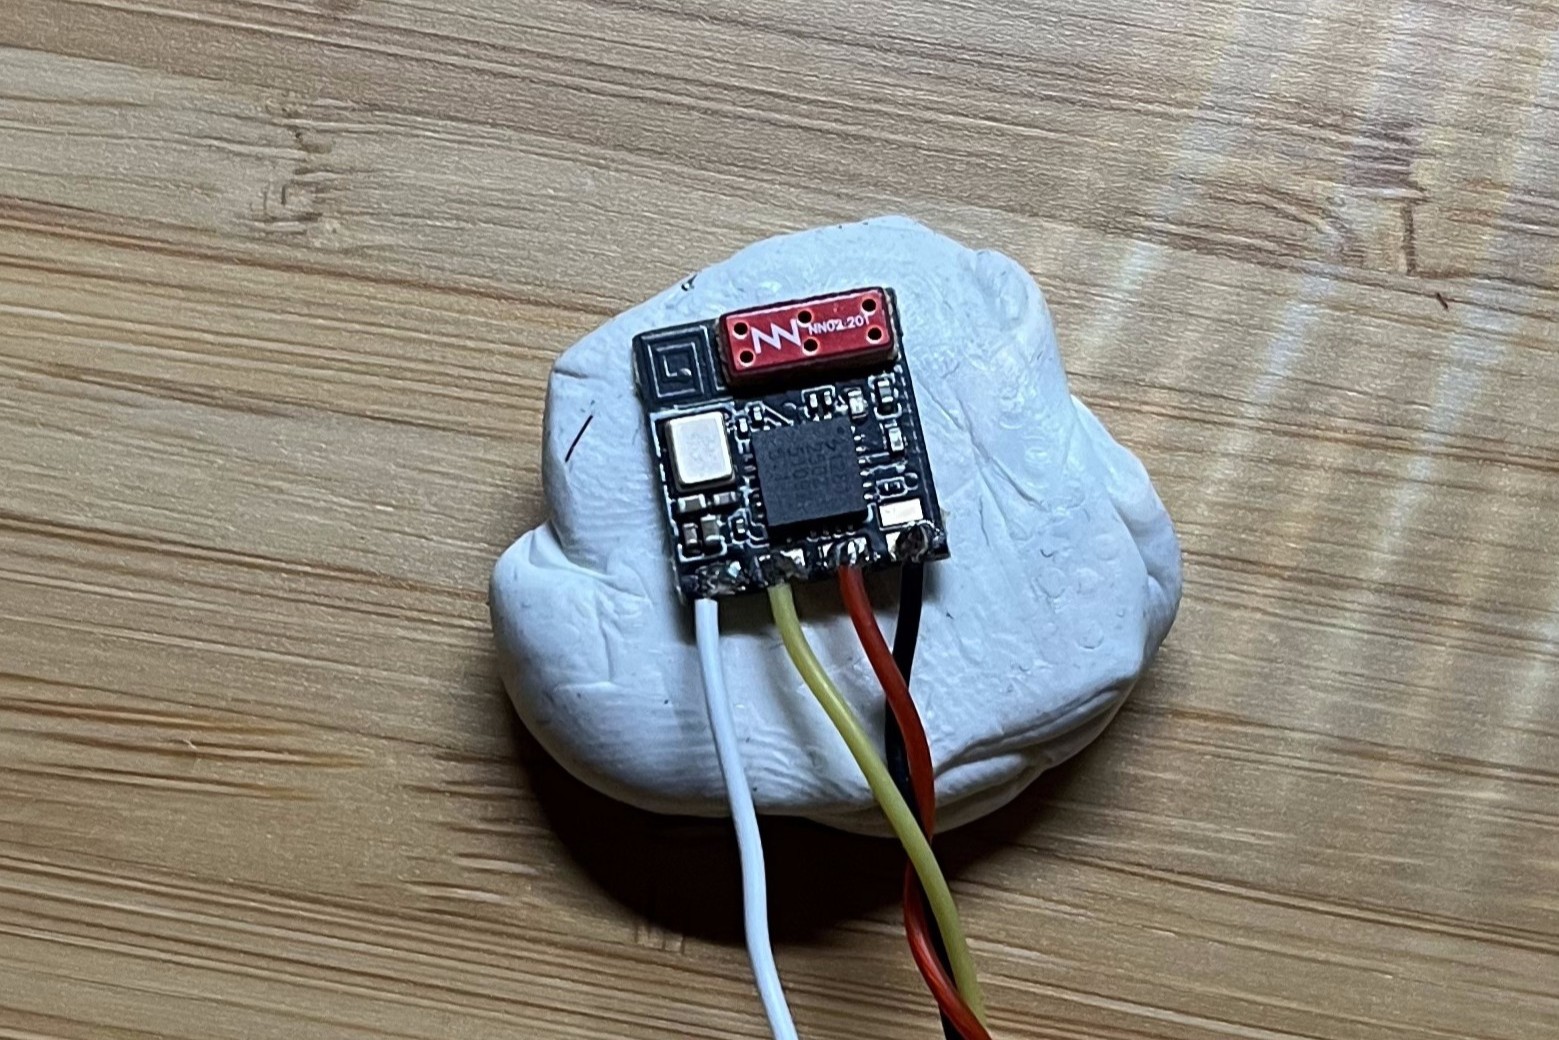
Soldering the wires included in the ELRS package onto the ELRS Lite module is relatively easy, just make sure that you don’t bridge any connections. I did it by tinning the wire, putting some solder onto the pads and then just touching the wire and pad with the soldering iron for a split second.
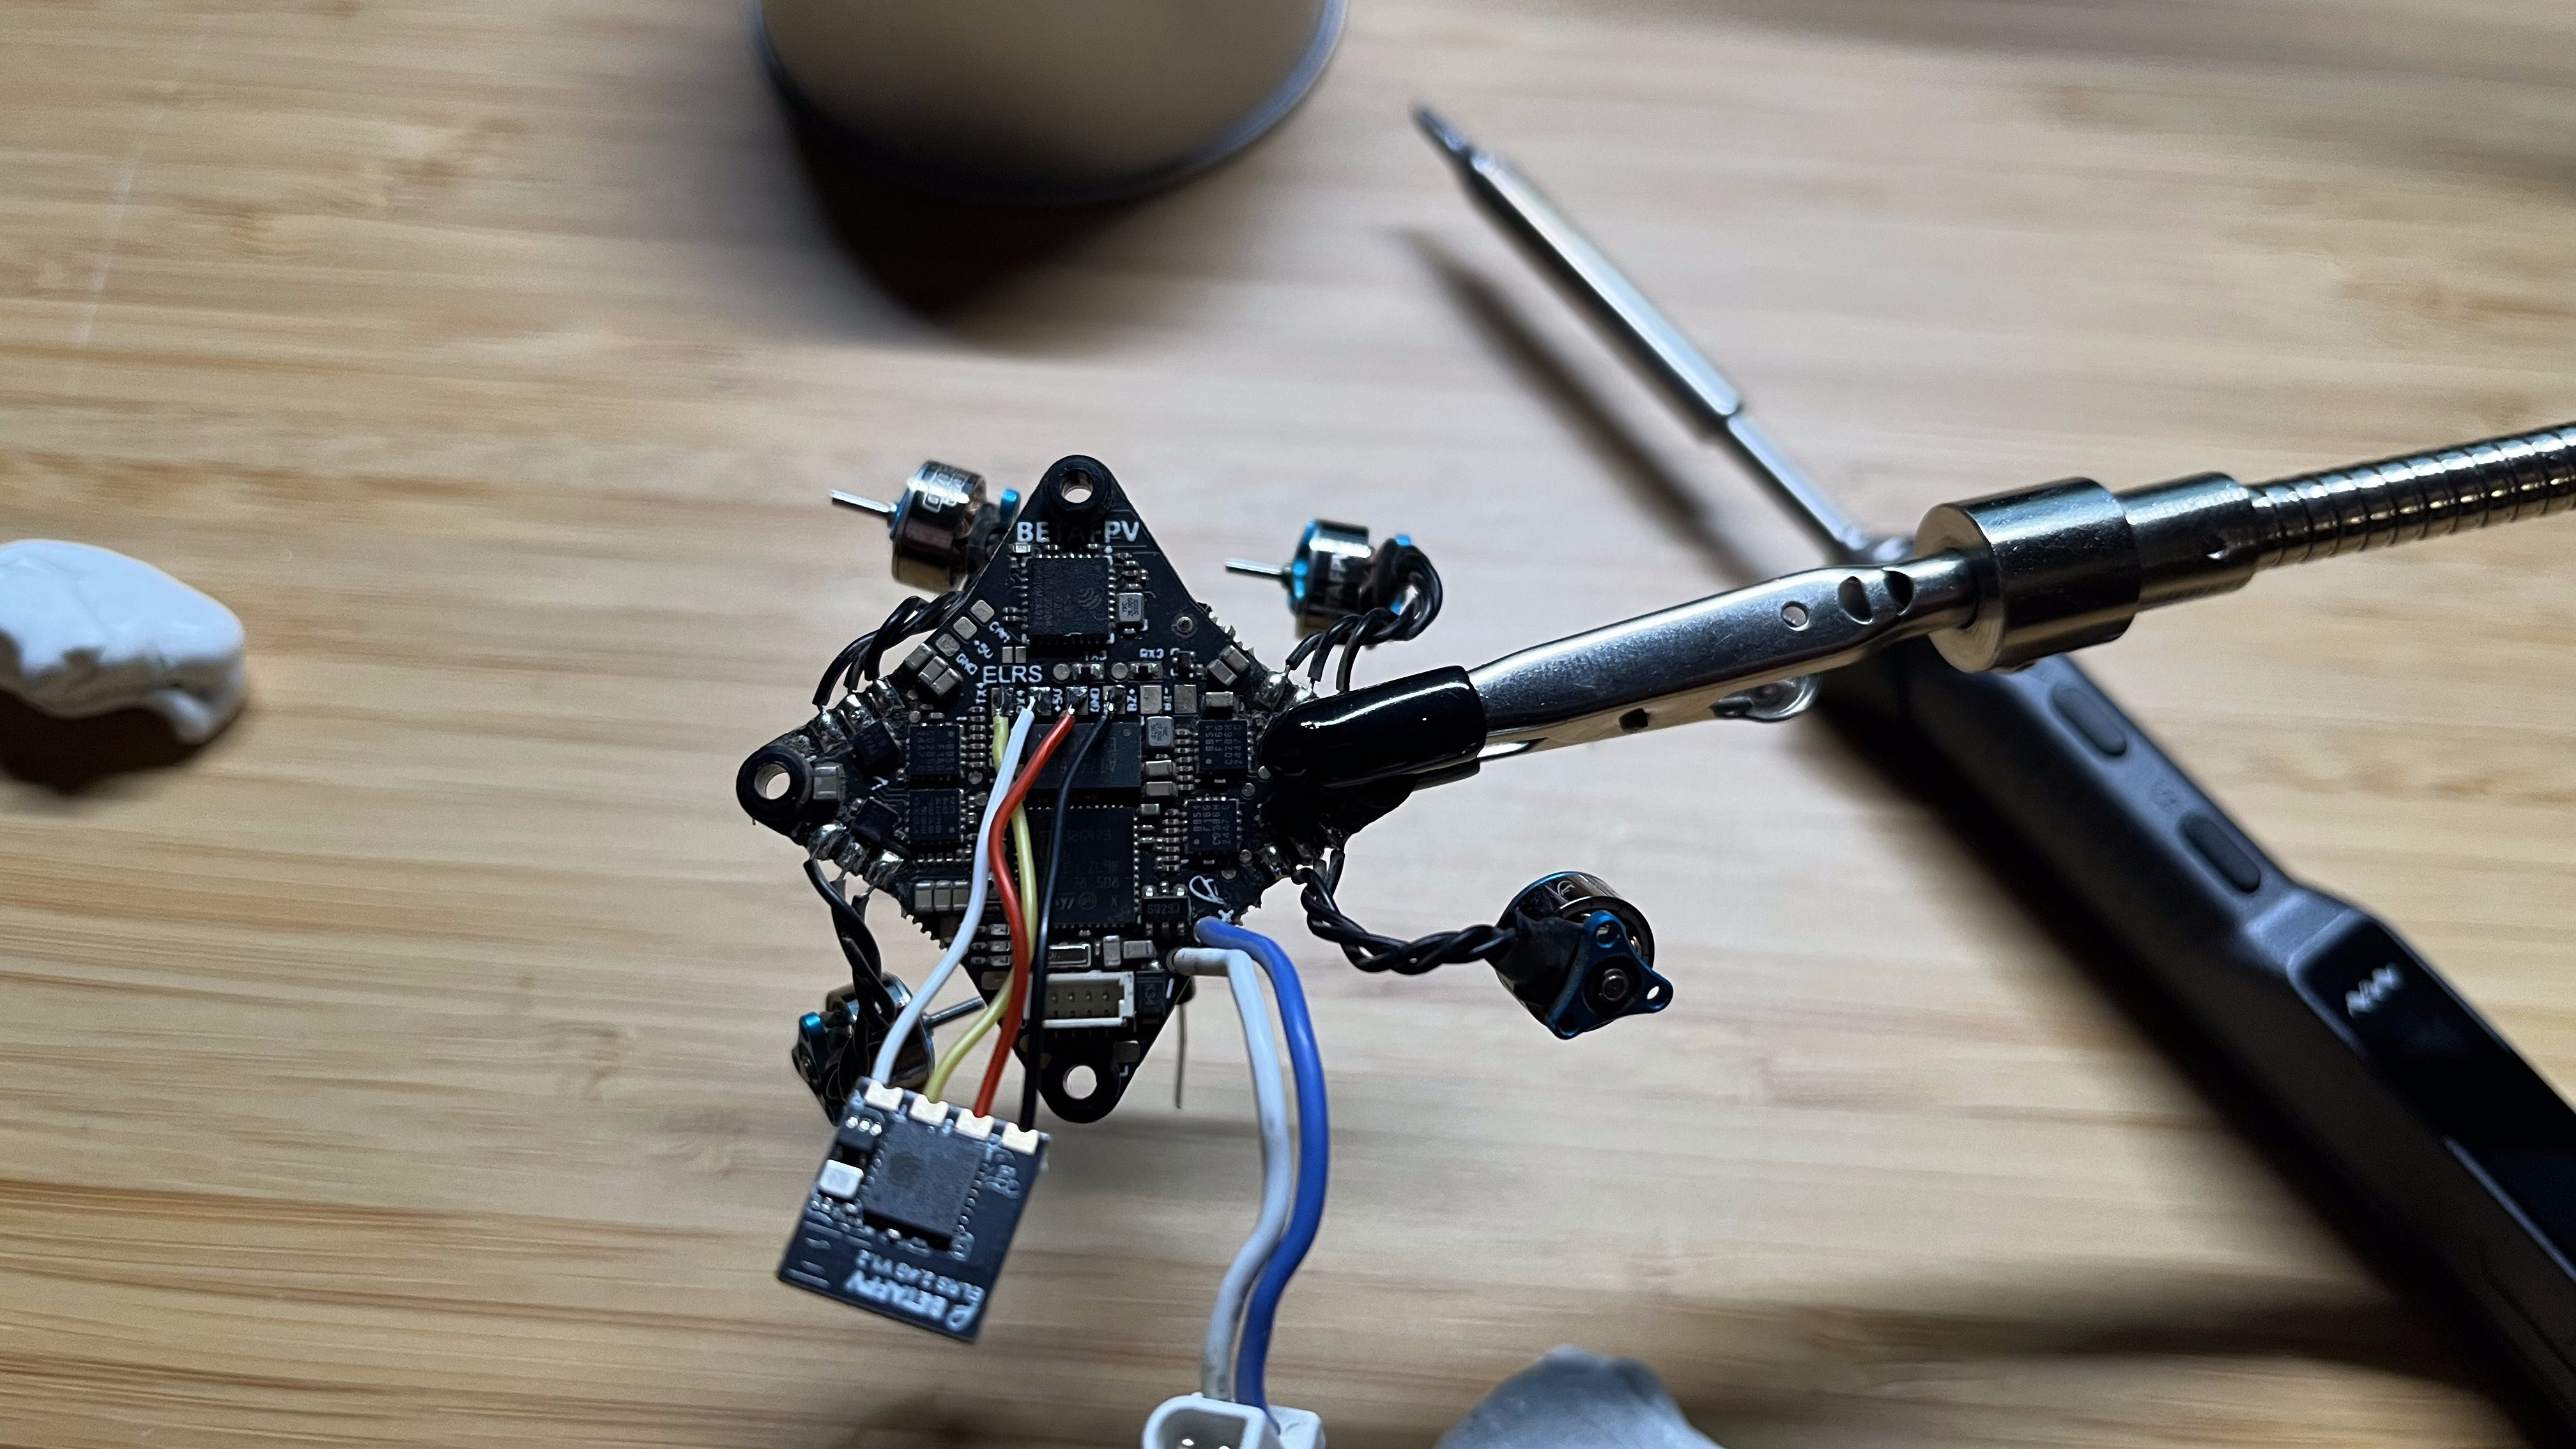
Next, let’s find the RX/TX pads on the FC: on the Air 5in1, they are on the bottom of the chip in the center. They are thankfully labeled with ELRS and also with RX, TX, 5 and GND next to the tabs. It is obviously critical to connect the wires from the ELRS Lite tothe correct pads on the FC. One thing to consider is that the RX pad on the flight controller must be connected to the TX pad on the receiver, and the same naturely goes for the TX pad. This is where I went wrong at first!
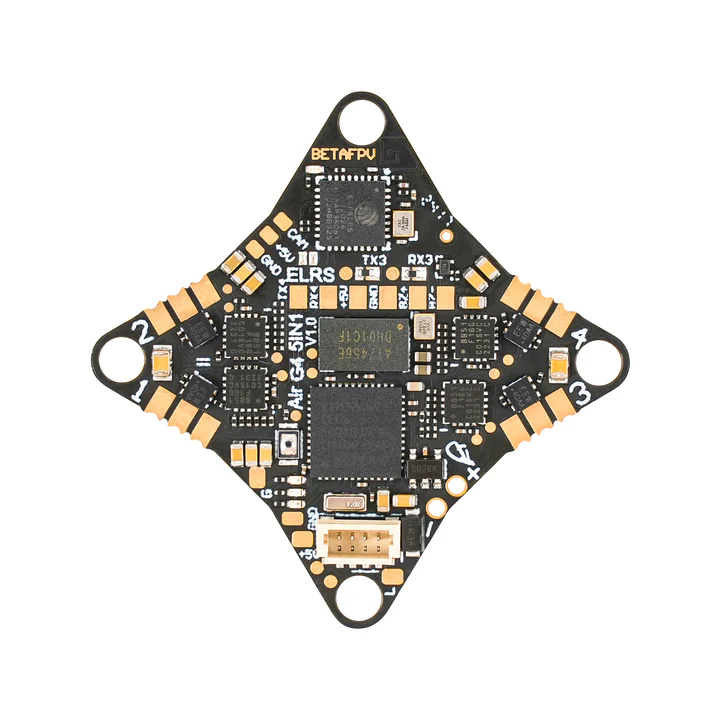
After soldering, check your connections. None of the pads must be bridged and the wires should all be connected correctly. So: 5 → 5, GND → GND, RX → TX, TX → RX.
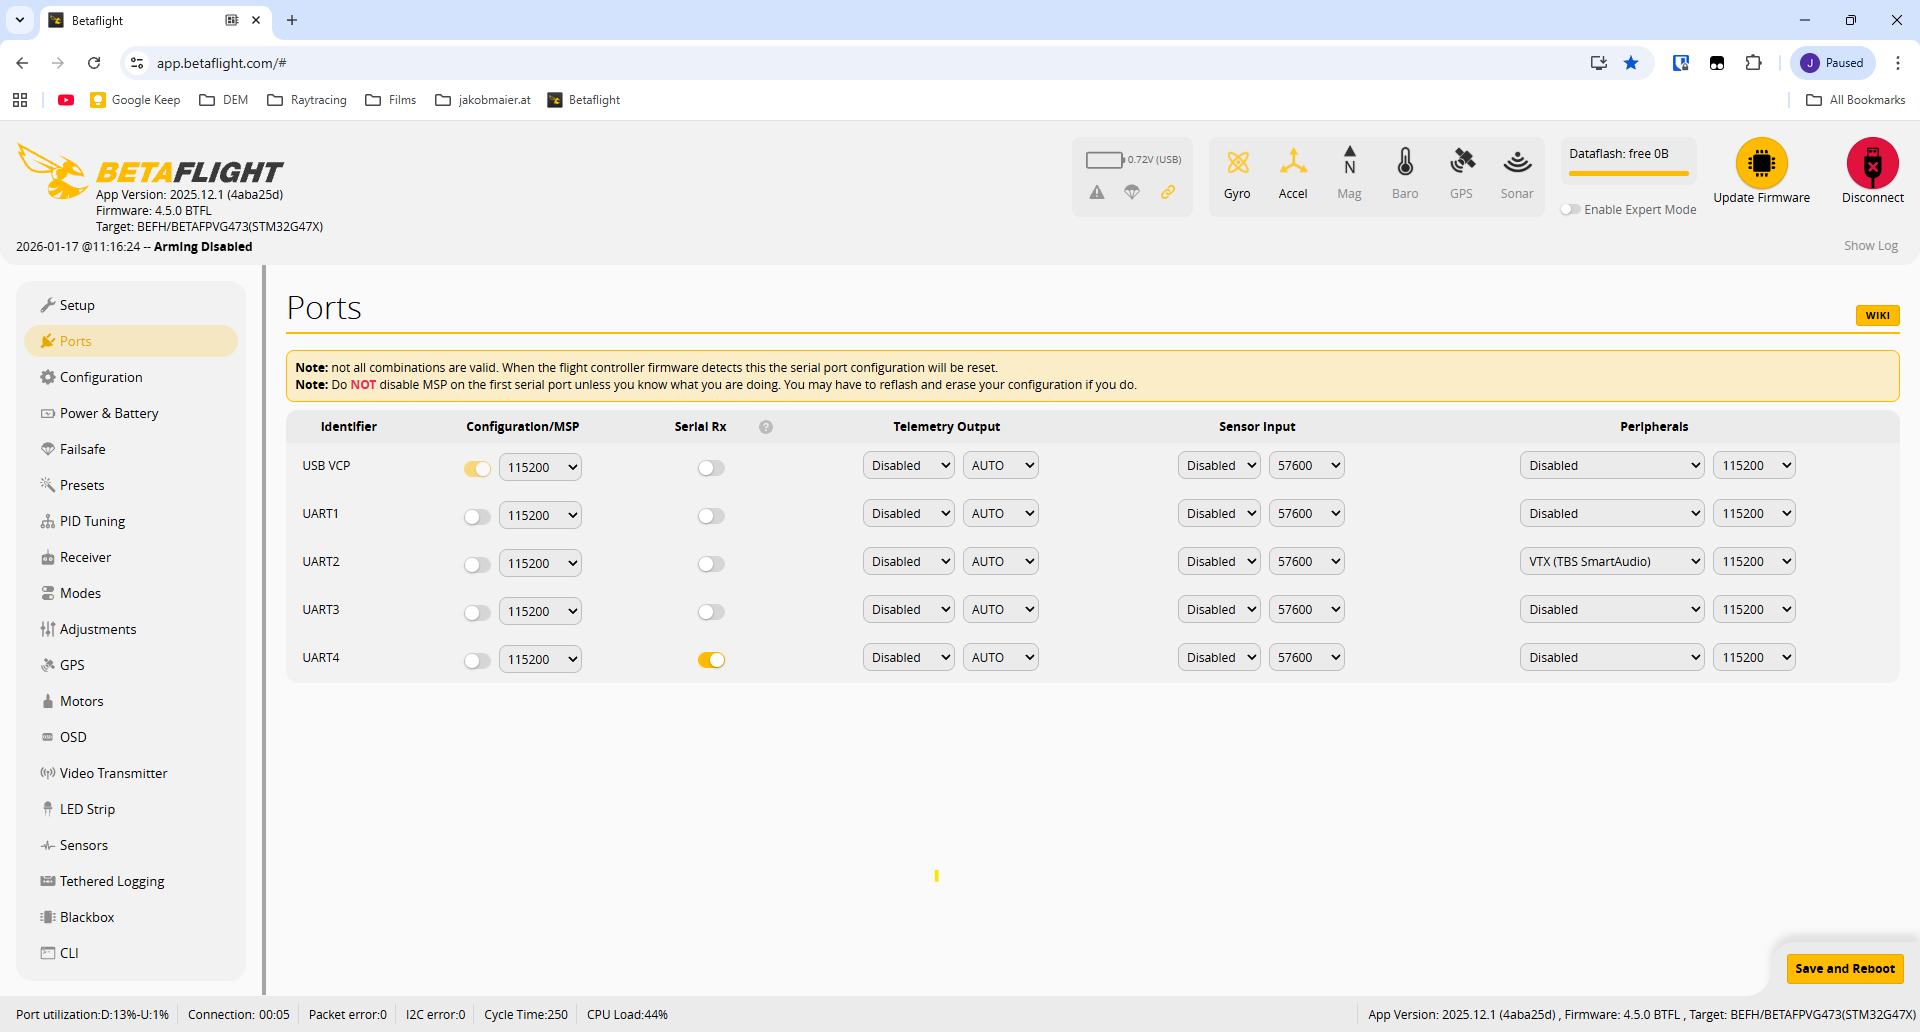
The next step is to enable this ELRS module. For this, connect the FC to betaflight configurator by going to app.betaflight.com, and pressing connect. Next, go to the ports tab and disable UART 3 and enable UART 4. Press Safe and Restart. Your FC should now be configured to use the ELRS lite that you have installed.
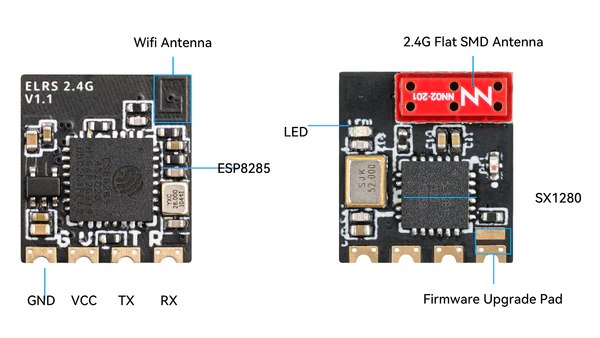
Now we just have to bind our transmitter. I wrote a little article about this, which you can find here. Basically, the easiest way of binding the radio with the drone is by plugging and unplugging the battery on the drone 3 times. This puts the ELRS receiver in bind mode, which is indicated by the LED on the receiver blinking twice in a cycle. Now you can simply press Bind on your radio, which should connect the two. The indicator LED of the receiver should now be solid, which means binding success.
Please be aware that in my pictures the RX and TX cables may be switched!